
The Tools That I Use
My last few blog post have been very me focused rather than my art focused. So I thought that for this weeks blog, I will give the art a chance to shine by looking at the tools I use to create it.
So lets dive on in!
TOol 1 - my ipad (and pencil)
The work I create is digital art, and thus is created through digital tools. Specifically my iPad Air 4. Here it is.

Not the cleanest case, woops. Sticker courtesy of my wonderful wife (guess the fandom!)
I have had iPads for a long time, but never really used them for art. I wanted to, however. Many a time I considered buying one that worked with the apple pencil and giving digital art a try, but could never justify the expense.
Then my daughter accidentally (helpfully) broke the family iPad.
Excellent, I thought, I need to buy a new one anyway now, so lets get myself a drawing one and use my current one as the family iPad.
Thus commenced some serious research. When I need to make a big decision, I research the heck out of it (my wife calls it Lilly4.0). The research showed that, for my needs, the iPad Air 4 (latest at the time) would work perfectly for my needs, which was basically digital art, internet and kindle.
And so my journey to digital art began!
tool 2 - procreate
Further research showed me that it came down to two apps for digital art on the iPad - Adobe or Procreate. I went for Procreate. Why? Cost, to put it bluntly, it was around £10 at the time to download the app and use as much as you like, whereas Adobe required a monthly subscription that, frankly, I could not justify to myself.
I think it shows what good value for money Procreate is, that I still use it and have not considered moving to Adobe. It is absolutely brilliant, and I thoroughly recommend it to anyone who has an iPad and wants to give digital art a try.
Don’t get me wrong, it takes some getting used to, but that is mainly learning how to draw on a screen and use all the brushes and tools (NOT an easy transition, let me tell you). Procreate itself, however, is easy and intuitive to use, and has a ton of functionality. I have created so many different styles of digital art, and even created short animations for some work education videos (if you guess the topics, you may actually make me believe psychics are real…)
Tool 3 - Brushes
Procreate has loads of different brushes, and you can also purchase some from external providers, or even make your own!
Whilst I have used many, many, different brushes, to create my current pieces I actually only use three!

1 - Derwent Pencil
I use the Derwent pencil to do the first sketch of my piece, from the intial composition ideas etc, to the first detailed drawing. Why Derwent and not all the other pencils? - Honestly, I am not sure, I just like it so I stick with it!

2 - Studio Pen
This is used to draw the final outline, and detailed colouring. This pen has a really nice flow, and also it can go really thin which is helpful.

3 - Carbon Stick
All my shading is done with this brush. I love the texture it provides, and it has a really big range between dark to light which gives a lot of flexibility. Is is also a bit transparent, which makes it perfect for blending colours.
All three are preloaded brushes on Procreate.
Tool 4 - Other
This seems like a bit of a cop out catagory, but there are a few specific, non brush, tools that I use on Procreate that are indespensible.
First is the colour drop. You can drag and drop a colour to fill a section of your art work. It’s a real time saver, as I create full colour pieces and means I can very quickly and neatly fill sections with the base colour.
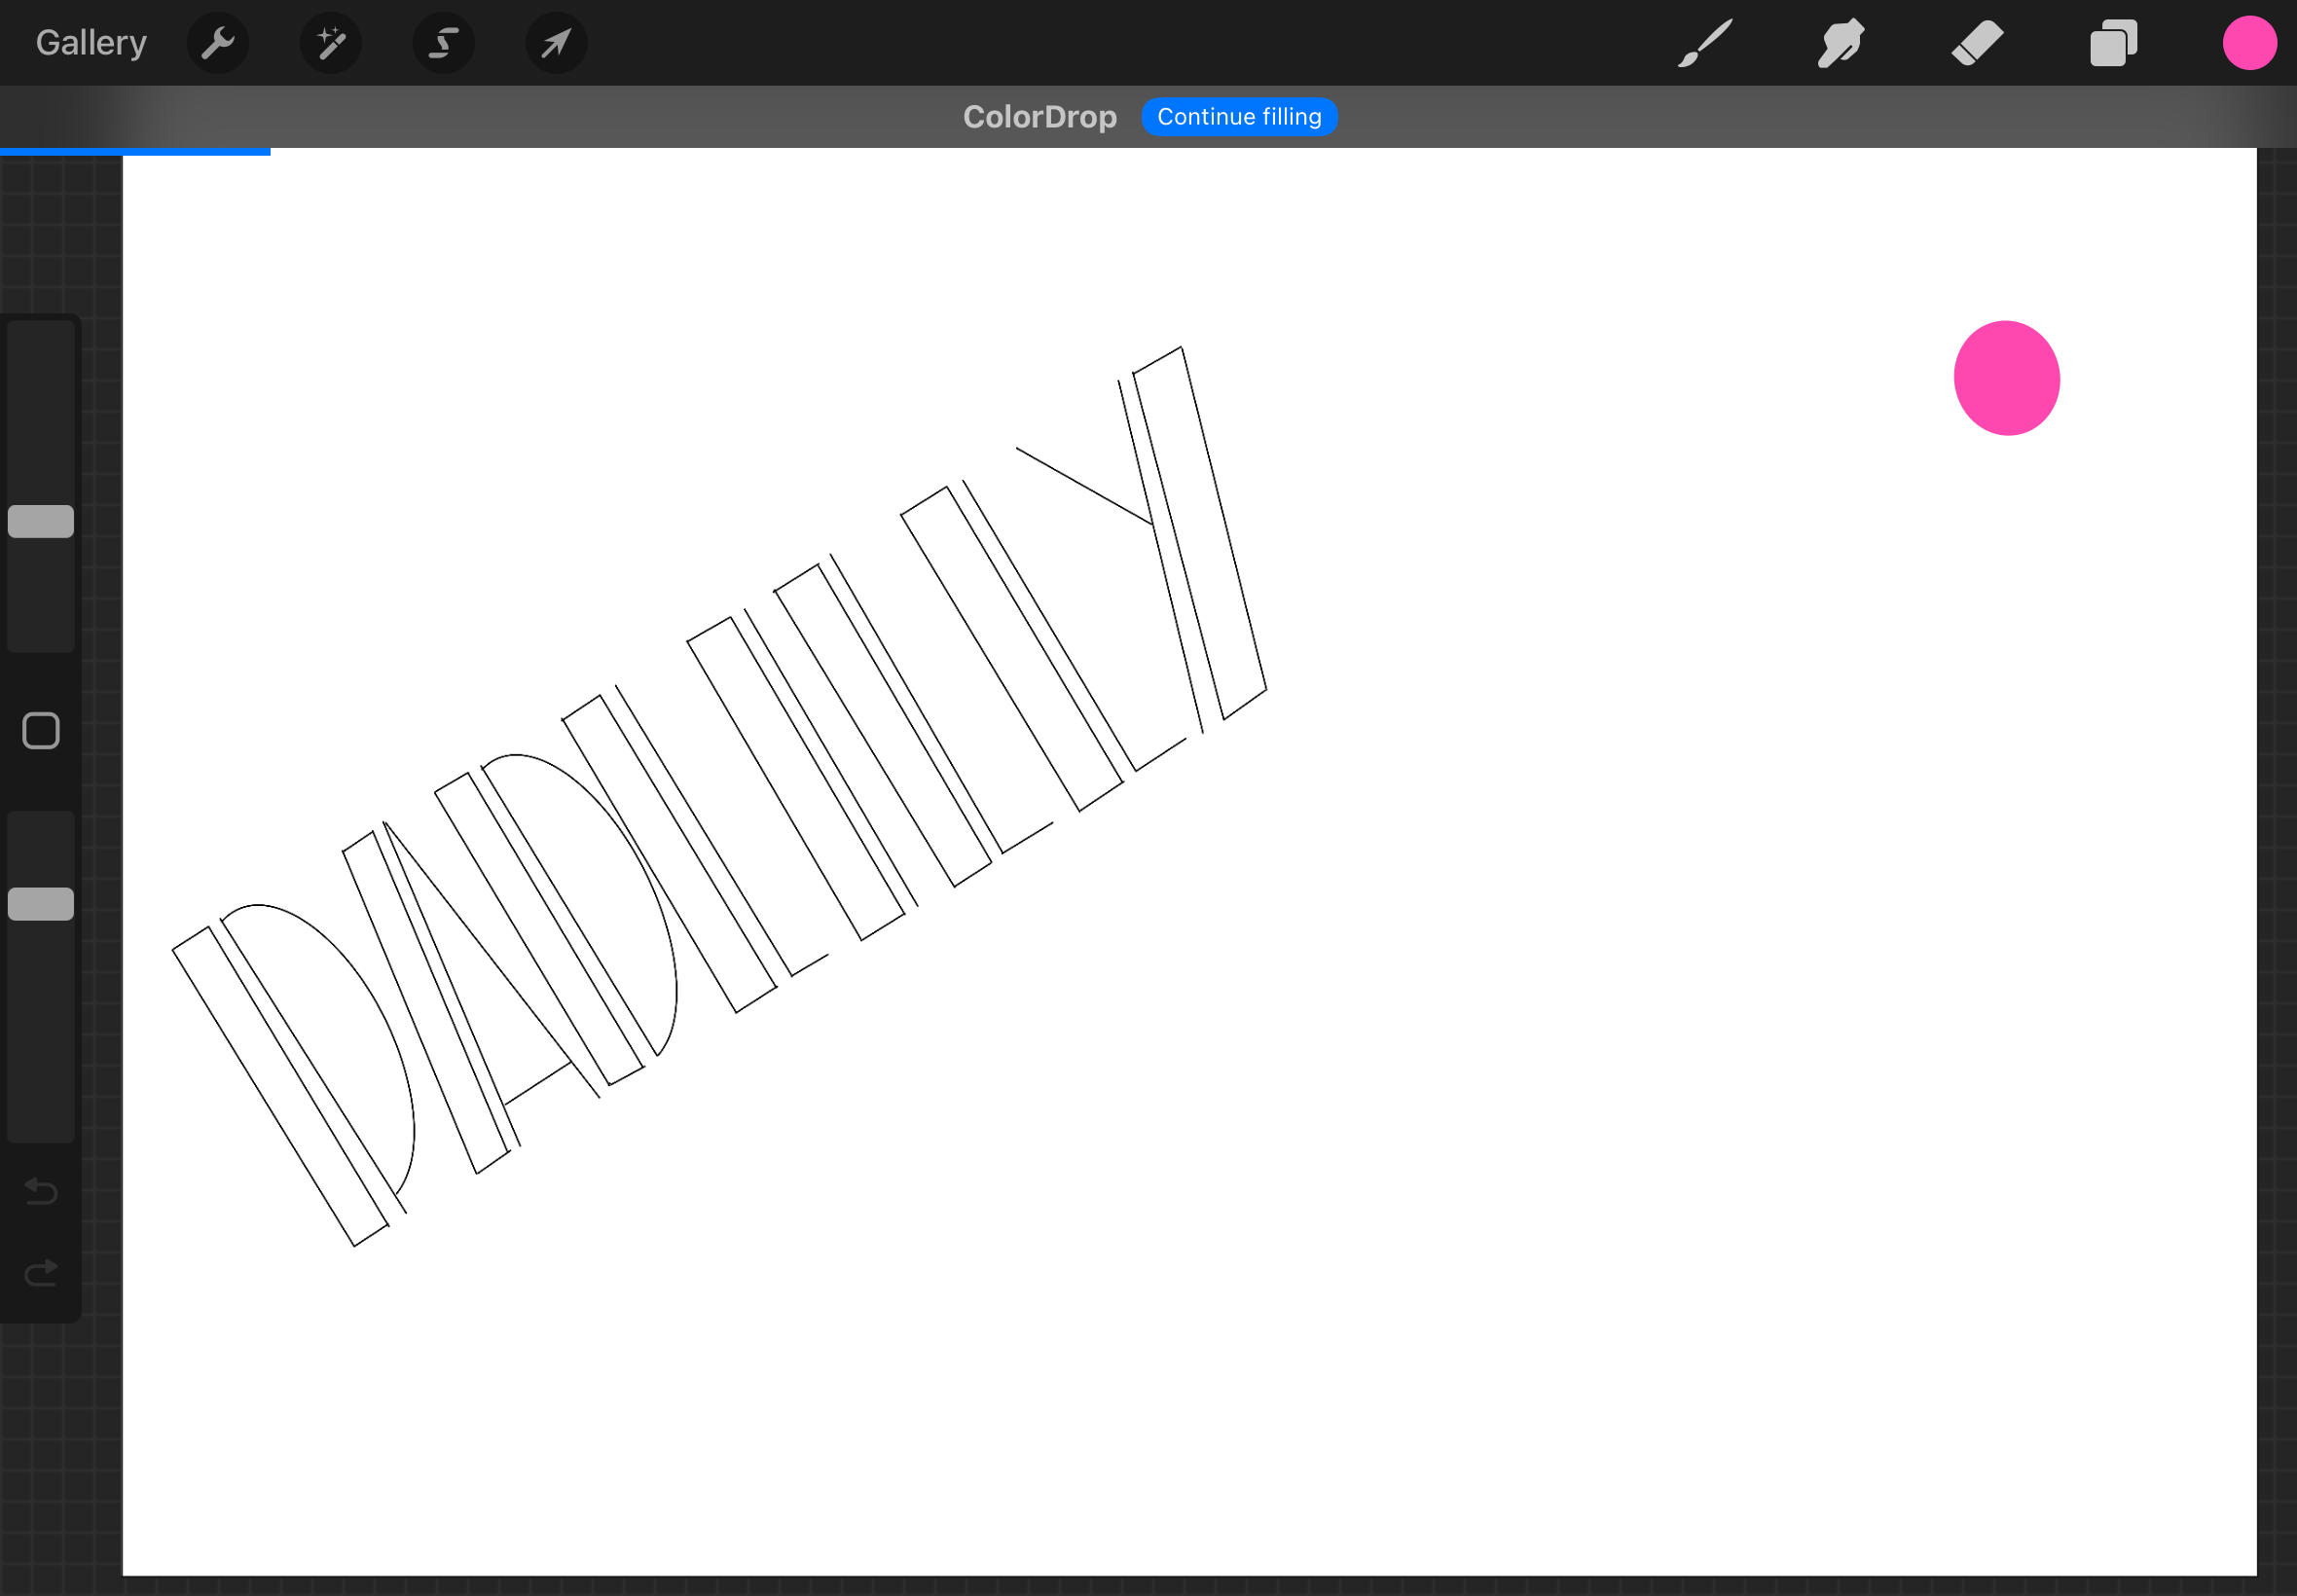
It was really hard to get an image of this
That pink dot is not a drawn splodge, it is in fact me dragging the colour from the top right corner to its target area. You will have to trust me on this.
Second is automatic selection tool. It enables to me to select a specific area of the piece to work on - anything outside of that area cannot be worked on. Its really important in the shading of my work, allowing to create the correct shading on the correct bit without contaminating other areas, especially in small sections.


Third is the “reference layer.” This is something you can select for one layer in a piece. It becomes the bounds for any colour drop and fill, or autoselect you do within the entire piece. My pen outline will always be the reference layer for the piece of work. It means I can use colour drop and autoselect on blank layers, referring back to the reference layer, and therefore keep my colours separate (needed for how I do my colouring).

Finally, there is the multiply option for the blend mode of each layer. By selecting this, it makes each layer translucent. This means they all interact rather than covering each other up, and is how I make multiple colours on a limited colour palette.

Simple needs
And there you have it, my key tools. There are other things I use on procreate of course, but these are the vital ones.
I do not claim to be an expert on this, so please do not take this as a tutorial! But I hope it was helpful to take a peek behind the kimono (a McElroy brothers reference there for you).
I am happy to answer any questions you may have (not going to promise they will be good answers but I will try!).
In the meantime, I will say Adieu via a Catherine photo, as always.

- Padlilly